
Why count a little at a time
A wall-to-wall count tells you what was on the shelves on one day. Within weeks, unrecorded moves, receiving mistakes, and scrap nobody logged start to pull the system away from the floor again. Cycle counting checks a slice of the warehouse every week, so errors show up while people still remember what happened.
It also keeps the building running. Instead of stopping receiving and production for a day or more, one or two people count a set of locations or SKUs during a normal shift. Our guide to cycle counting vs. physical inventory walks through the trade-offs in more detail.
Cycle counting is a Pro feature in Swift WMS. Adjusting a single license plate with a reason works on every tier, so stock can be corrected between counts on any plan.
Five ways to scope a count
Every cycle count starts with a count type. The type decides which stock lands on the count, so choose it based on the question you are trying to answer.
- By Location: count everything in a set of locations, such as one rack row or the staging area. This is the best way to find stock sitting in the wrong spot.
- By SKU: count one SKU wherever it sits. Useful when a production shortage or a customer question points at a single item.
- By SKU Type: count all ingredients, all packaging, or all finished goods in one pass.
- By ABC Class: count the SKUs in one class, so A items get counted more often than C items.
- Full Inventory: count everything. Useful for a year-end count, or as a clean baseline before you start a cycle program.
Location counts go faster when every location has a clear, consistent name that matches its label. Our post on building a warehouse location naming system covers how to set that up before your first count.
From schedule to adjustment
A cycle count follows the same steps every time. Counters and supervisors always know what comes next, and nothing changes in inventory until someone decides it should.
- Schedule and assign. Set a date for the count and assign it to a team member, so it is a real task with an owner.
- Start. Starting the count locks the expected quantities. Counted numbers are compared against that fixed snapshot, not a number that keeps changing while people walk the aisles.
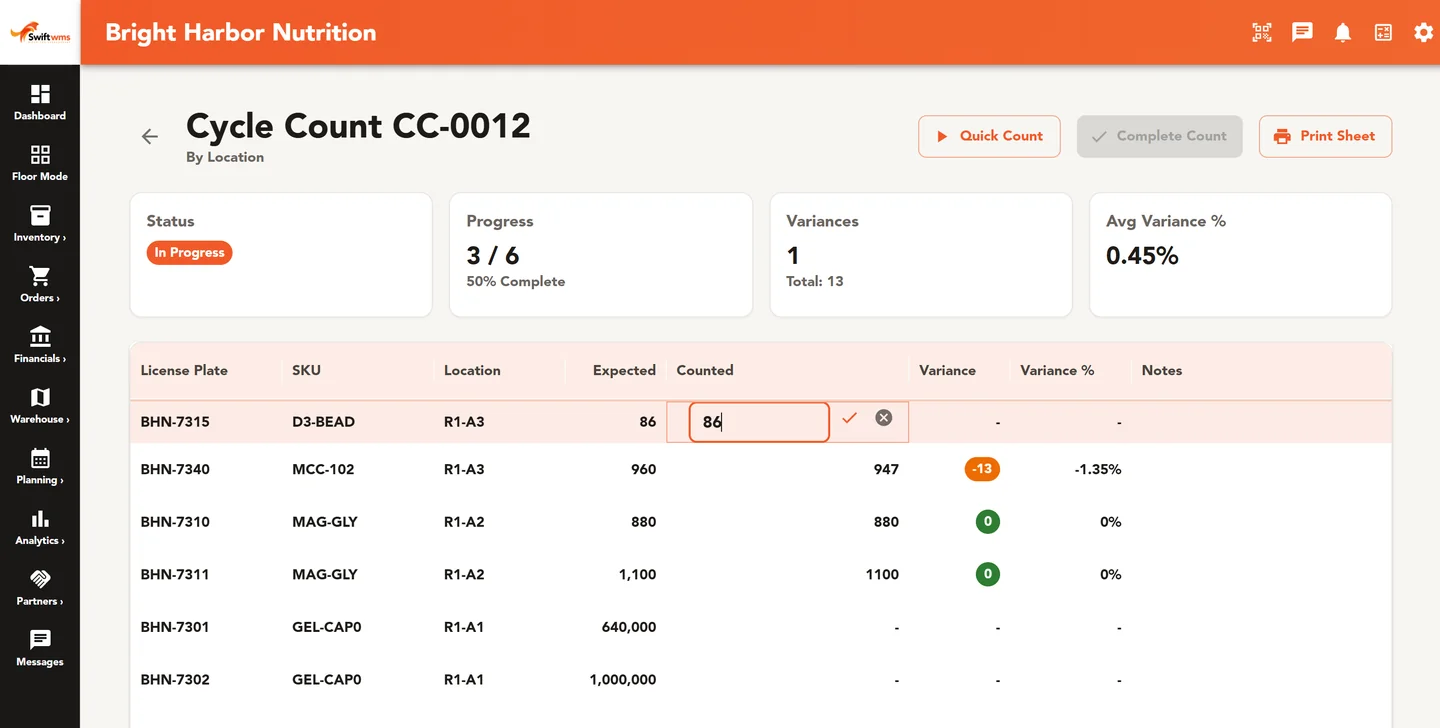
- Record counts. Enter the quantity found for each line. Add a note when something looks off, such as a crushed case or a plate in the wrong location.
- Complete. Close the count when the counting is done. The gap between expected and counted quantities is now on the record.
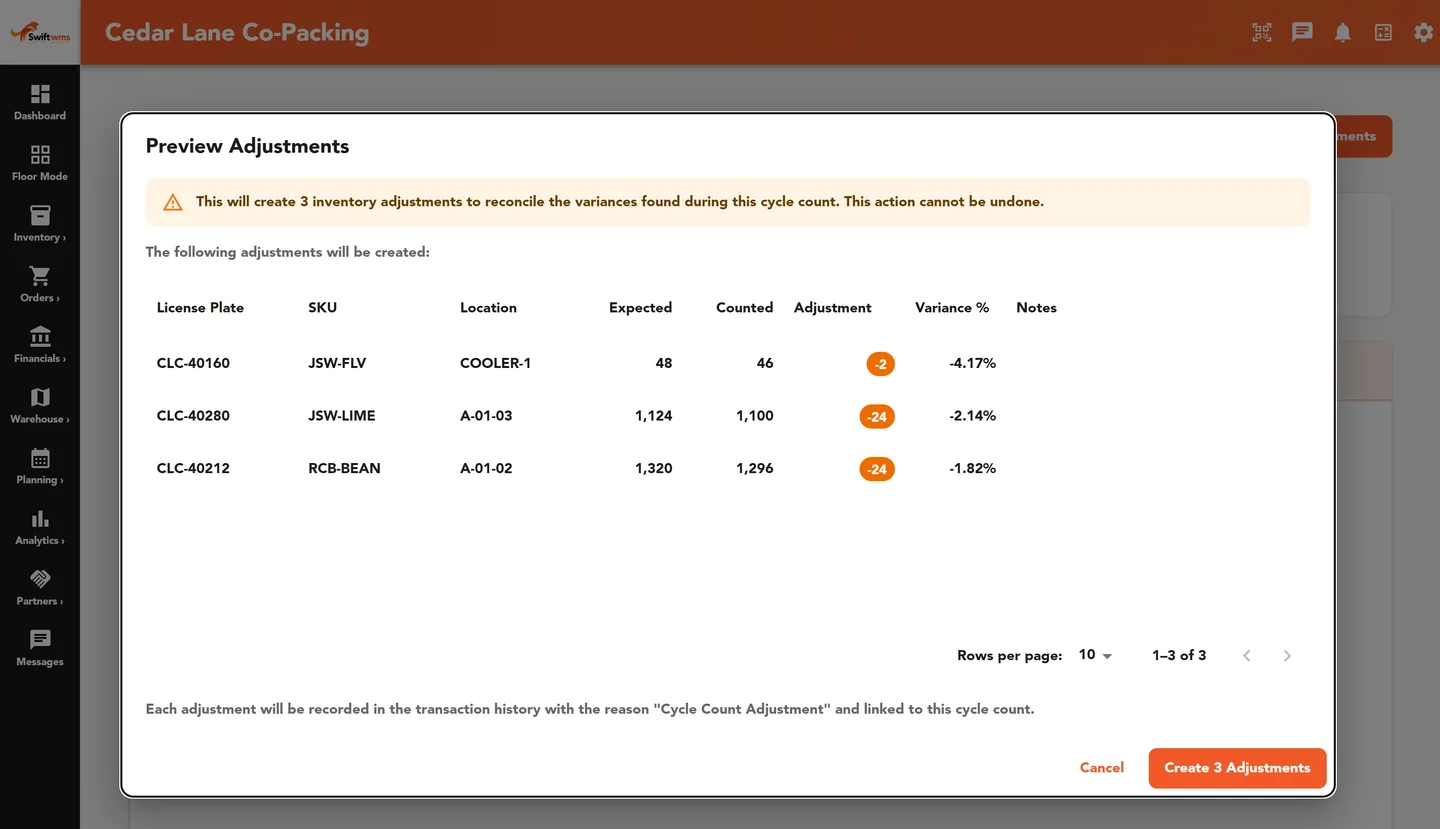
- Create adjustments. Turn variances into adjustments so on-hand quantities match the shelf. Each adjustment carries a reason.
Not every variance should be posted on the spot. A large gap on a costly ingredient deserves a recount, or a look at that license plate's history, before anyone changes the numbers. The notes your counters left are often the fastest way to the answer.
Counting on the floor with Floor Mode
Counters should not have to carry a laptop down the aisle. Floor Mode is the set of large-text screens in Swift WMS built for warehouse work, and it includes a Cycle Count screen next to Receive, Move, Ship, and Lookup.
Counters use it on a handheld or tablet. It works with hardware barcode scanners that type into the screen like a keyboard, and you can add it to a device's home screen so it opens like any other tool. Where a step asks for a code, a scan replaces typing, which helps avoid recording the right number against the wrong item.
Floor Mode runs in a web browser and needs a network connection, so test the signal in the far corners before the first scheduled count.
ABC Classification and User Metrics
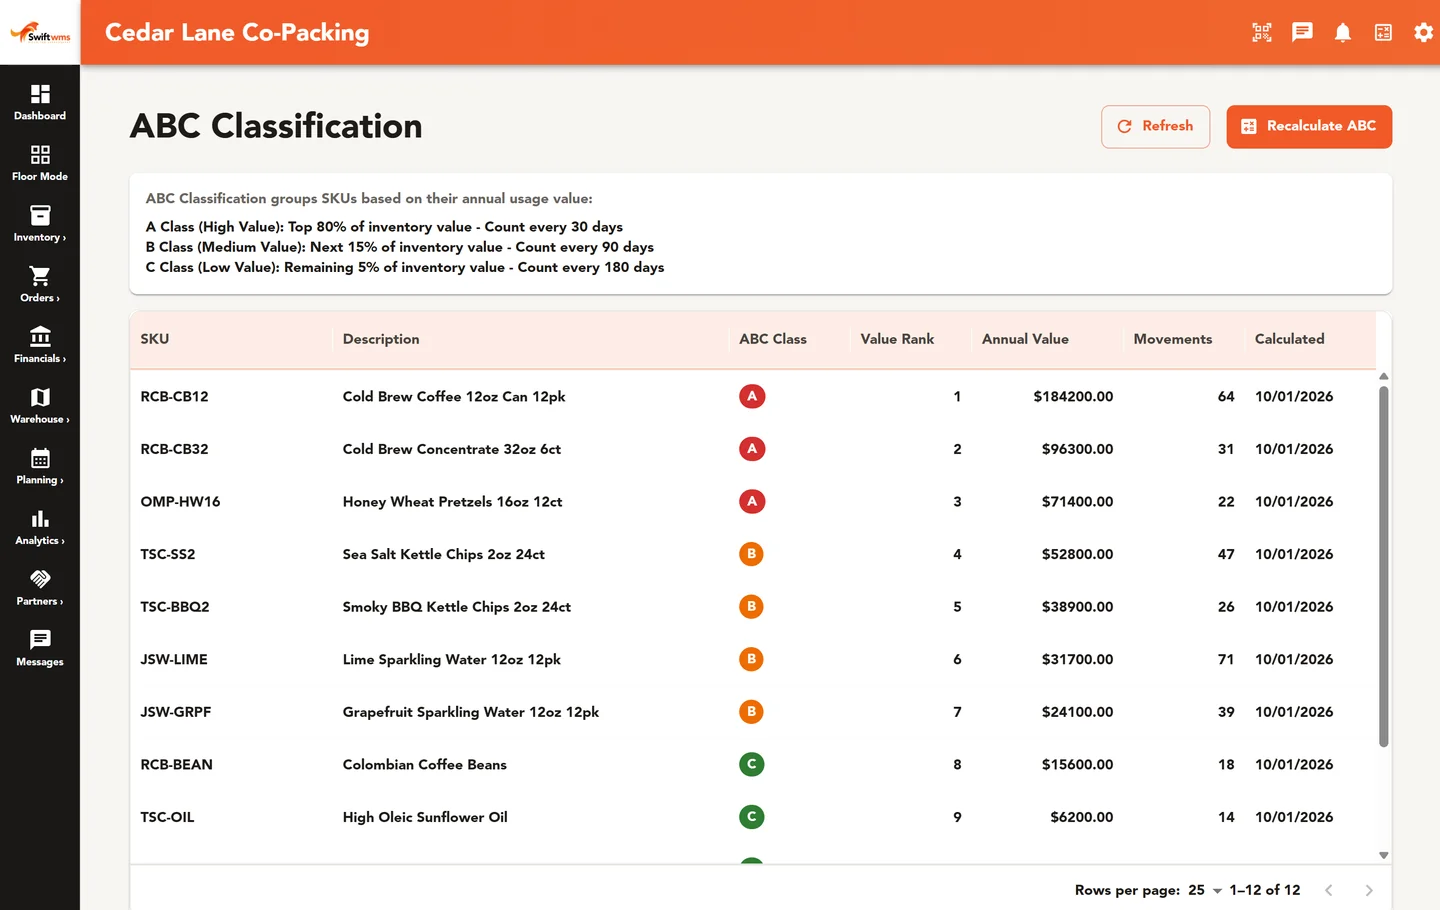
Not every SKU deserves the same attention. The ABC Classification page shows your SKUs by A, B, and C class, and the By ABC Class count type turns a class into a count. A common approach is to count A items most often and C items least often, so your effort follows the stock that matters most.
Our guide to using ABC analysis to plan cycle counts explains how to choose a ranking basis, set a count frequency for each class, and build a weekly schedule your team can keep.
The User Metrics page gives supervisors a view of cycle count activity by user. It helps when you are spreading count work across a team instead of leaving it all to one person.
Adjustments with a reason, and a report to review them
Every change to on-hand stock should explain itself. In Swift WMS, adjusting a license plate requires a reason on every tier, whether the change comes from a cycle count or from someone on the floor finding a damaged case. Read more about how each pallet or case is tracked in license plate inventory.
On Core and Pro, the Adjustments report collects those changes in one place. Review it every week. When the same SKU, location, or reason keeps showing up, that pattern points to a process problem upstream, such as receiving errors or consumption that never gets recorded.
Audit Logs add one more layer. They record who changed what and when, with the old and new values, so a surprising adjustment can be traced back to the person and the moment it happened.
Common questions
- Which plan includes cycle counting?
- Cycle counting is part of the Pro plan, along with the ABC Classification and User Metrics pages. Adjusting a license plate with a required reason works on every tier, so smaller teams can still correct stock between counts. The Adjustments report is available on Core and Pro. If you are not sure which plan fits your operation, our team can walk through it with you.
- Why does starting a count lock the expected quantities?
- Stock keeps moving while people count. Locking the expected quantities at Start gives each count a fixed baseline, so every variance compares what the counter found with what the system showed when the count began. It still helps to hold off on moving stock in the locations being counted until the count is complete, so the counted numbers and the baseline describe the same moment.
- Do I have to post every variance as an adjustment?
- No. Variances become adjustments when you choose to create them. A good practice is to recount large or costly variances first and check the license plate history for recent moves. Small variances on low-value items can usually be posted directly. Either way, each adjustment carries a reason, so the record shows why the number changed and who changed it.
- Can we count with handheld barcode scanners?
- Yes. Floor Mode includes a Cycle Count screen with large text built for the warehouse floor. It runs in a web browser and works with hardware barcode scanners that act like a keyboard. Because it runs in the browser, the device needs a network connection in the areas you count, so check coverage before your first count. You can add Floor Mode to a device's home screen.
- Can we still run a full physical inventory?
- Yes. Full Inventory is one of the count types, so a wall-to-wall count follows the same schedule, start, record, complete, and adjust steps as any cycle count. Some businesses keep one full count a year for their accountant and use cycle counts the rest of the year. Others drop the full count once their cycle counts show steady accuracy.
Further reading
- Cycle Counting vs. Physical Inventory: Which Fits?
Compare cycle counting with the annual wall-to-wall count on accuracy, downtime, and labor, and learn how to move from one to the other safely.
- How to Use ABC Analysis to Plan Cycle Counts
Rank SKUs into A, B, and C classes, set a count frequency for each class, and build a cycle count schedule your team can actually keep.